Just announcing in the early, that ever since my Davina Dress, I became an Itch to Stitch fan girl. So I apply to test EVERYTHING Kennis Wong puts out. And I was beyond excited to be finally be able to test for her again.
Pattern: Itch to Stitch Designs Vienna Tank
Pattern Details:
- Sizes 00-20 (Body measurements: Bust 31-46″/ Waist 25-40″/ Hips 33-38″)
- Integrated yoke with woven fabric
- Bodice with knit or woven fabric – your choice
- Slight cropped and relaxed fit bodice
- Cute gathers above bust and at back
- View A: neck ruffles and center front uses wrong side of fabric as accent
- View B : streamlined with no neck ruffles
- Suggested fabrics for main are 5/8-1 yard of lightweight knits (jersey or interlock) and lightweight wovens for C cups and smaller (shirting, batiste, lawn, chambray, challis, crepe, broadcloth and linen)
- Suggested fabrics for yoke and ties are 5/8 – 3/4 yard of lightweight wovens, such as shirting, batiste, lawn, chambray, challis, crepe, broadcloth and linen.Sheer fabric is not recommended due to way the yokes are constructed.
- Layers feature (print only the sizes you need)
- Can print on letter or A4 paper and even large format A0
- 20 pages of Instructions and 13 Pattern pages
Price: USD $10.00
Pattern Format: PDF only
Difficulty: Intermediate
Techniques required: Sewing knits, hemming knits, making bias tape, making ruffles, blending sizes (if necessary).
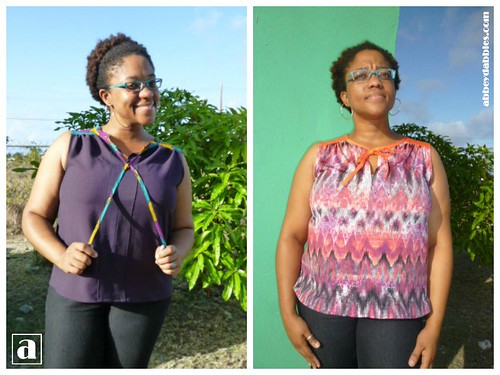
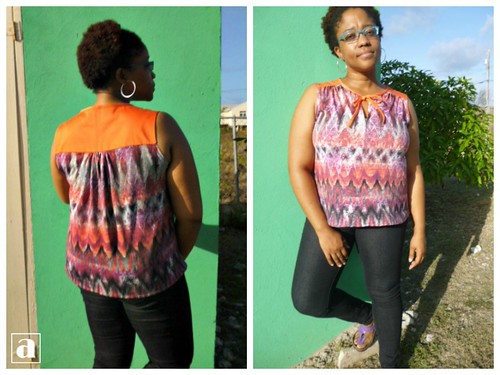
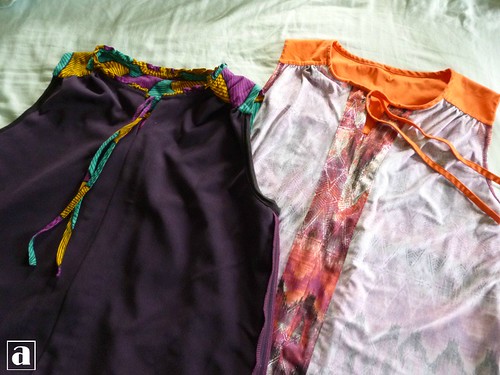
Fabric Used: All fabrics used during this test were from local store Abed’s. I originally signed up to test View B, which is without the neck ruffles, and made it using this beautiful pink/ magenta/ plum/ black/ white chevron ITY knit for the main.For the yoke and ties, I chose papaya stretch cotton twill.
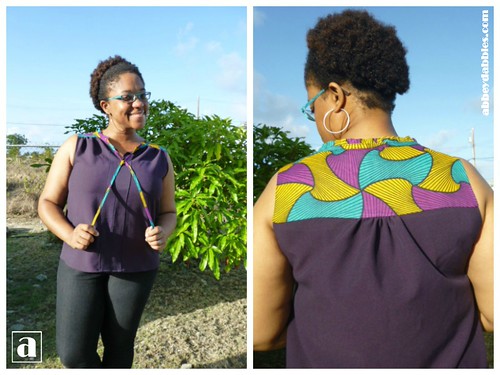
Then after the ruffle versions started coming in to the testing group, I was totally convinced I NEEDED to try View A as well. However, I also wanted to see if I could use a woven for the main without having bust issues. Into my stash I went in search of a stretch woven to be on the safe side and came up with my favourite plum stretch cotton twill for the bodice and one of my beloved Ankara 100% cotton prints for the yoke, ties and ruffles.
Size Made: Despite my body measurements placing me in size 16, I made up size 14 for both views based on the finished garment measurements.
Pattern Adjustments: For View B (Knit Bodice), I didn’t have any real adjustments to make, except for reducing the side seam at the armscye by 1″. It felt a little too loose for me there.
For View A (Woven Bodice), Kennis had suggested that anyone trying the woven version should first increase the gathering part, to which I added 1″ and that worked great for my stretch twill over my 36GG bust. I didn’t have to reduce the side seam at the armscye for this one, although there was a slight pucker just below the yoke seam on the front and I took 1/2″ wedge out at the armscye on the bodice piece to fix that.
After making View B, I had to shorten the neck slit by 1″ for View A. Just way too much boob peeking out for me.
For both views, I kept the ties the length of the largest size on the pattern piece because I knew short ties would annoy me.
Favourite Things: This pattern is a quick sew. Quick to assemble, quick to cut, quick to make. I joked in the FB group that the longest time taken is in choosing which fabrics to use. And it’s the truth. Before I even finished making the first one, I already had fabric pairings for future makes in my head. I probably took about 3-4 hours on the first one, and that was because I obviously was following the instructions word for word and didn’t do any of my usual non-testing cheats.
The length of this top is spot on for me, and I’m only 5’3″. Normally, I’d have to shorten the bodice on most patterns, so this was a real plus for this pattern.
This pattern truly uses up your 1 yard and less than 1 yard fabric stashes. You know that beautiful woven you own and are so afraid to cut into it? This is perfect for using up some of that precious stuff.
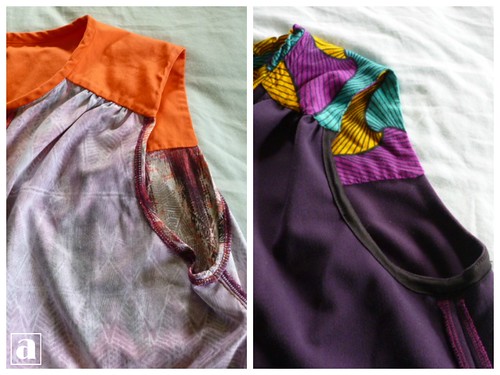
Love the burrito-style construction method of attaching the yokes to the front and back bodice pieces. Makes inside so neat and professional-looking.
I like how Kennis has two ways of handling the centre front seams. You can simply sew the bodice front pieces right sides together and top stitch the folds so they’re on the inside of the top, or you can sew the bodice front pieces wrong sides together and top stitch the folds so they’re on the right side of the top. The folds to the right side of the top would be really great with a fabric that has a distinctive wrong side. My plum twill is darker on the wrong side and I like the little contrast that makes. Even if I’m the only person who’d notice.
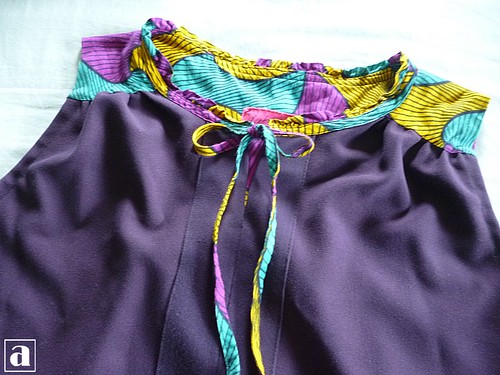
My immediate draws to the pattern were the bow tie close and the yoke. Major must-have shirt features for me. But shockingly, I adore the neck ruffles. ADORE. Can’t wait to make another View A.
My absolute favourite thing about Kennis’ patterns are how beautifully designed the instructions are. I especially love all the effort that goes into her illustrations for each step.
Concerns: When assembling the pattern, the pattern labels read upside down to the page numbers, so just be aware of this. It’s strange, but not a deal breaker.
I am not a fan of the method of handling the seam allowances on the armholes of the bodice front and back. I never liked simply turning under knit seam allowances on necklines or armholes. I do recognize that method as the quicker way, but I don’t like how it looks when, like me, you don’t own a Cover Stitch machine. I definitely prefer using some bias tape to finish those areas whenever possible.
Changes: I want to try it without the ties. It looked like this would be still pretty awesome when I did my first fit test on View B, so I’d love to incorporate some kind of Mandarin collar or maybe just widen the bias tape some and end it at the neck slit. I’d also make the ruffle about 2″ tall instead of the pattern 1.5″, to highlight that feature more.
I’d also like to try reducing some of the back gathering and slimming down the silhouette to make it somewhat fitted. I think that can work without completely changing the aesthetic of Kennis’ design too much.
Overall opinion: Wardrobe Staple. I seriously cannot express how much love I have for this pattern. So many hacks for this are running around in my brain. Changing the neckline finish. Extending the length to make a dress. Using different fabrics to make some that are casual and some that are more office attire. Using bias tape on the front folds or making the front folds from a contrasting fabric. Wearing it tucked it or out. This top is super versatile and super cute for any age or shape.
Please check out the other fabulous testers here.

DISCLAIMER: As a tester of this pattern, I received the final pattern for free in exchange for my working with the designer to create this awesome pattern for all of us sewists out there. My opinions remain entirely my own. This post may also contain affiliate links, which means I get a very small commission when you check out any of the suggested pages contained herein.


I really like the colors and prints of your fabric choices! That certainly looks like it would be a great tried-and-true pattern, the ruching at the shoulders is both a flattering detail and probably make for a nice, comfortable fit across the bust! Beautiful sewing!
LikeLike
Awww thank you! Itch to Stitch patterns are always great sews for me.
LikeLiked by 1 person
Your versions are both lovely, your colour combinations are great.
LikeLike
Thanks! I wear one of these almost ever week.
LikeLike
Oh, I really love the fabric combos! Especially the purple! I either need to lose weight (ha!) or figure out how to make patterns bigger, because I checked out the Itch to Stitch website and they have a lot of great things, I can see why you like them.
LikeLike
I love your versions and fabric combos 🙂 Also, I LOVE your review. It is so thorough! I also really like your idea of adding a mandarin collar and increasing the ruffle height. Such a great pattern!
LikeLiked by 1 person
Great job on those tops! I like the little ruffle at the neck. I didn’t really notice it until I saw your close up.
LikeLiked by 1 person
The neck ruffle is a really nice feature. That’s why I said I’d want to make them taller for the next make.
LikeLike